
Eggless Marble Cake Recipe | Marble Cake (Eggless, Butterless)

Eggless Papaya Chocolate Chip Muffins Recipe | Vegan Papaya Muffins Recipe

Eggless Dates Cake | Eggless, Butterless Dates Cake Recipe

Spiced Apple Cake Recipe
I love baking with fruits, most of my baked recipes are with different fruits and here again I baked a cake with my favorite bake fruit – Apple. This cake I baked together with gingerbread man cookies and packed along fruit cake, all these goodies for cuties nibbling.
Coming back to this cake, it’s very simple cake with minimal ingredients, all the spices makes it very interesting and flavorful plus the aroma is so good, it’s soft, moist and crumbles just a perfect cake packed with apple goodness. If you like spices then you going to absolutely love this cake and if you don’t like spices then reduce the quantity to get just touch of spices, adjust according to your taste.
Ingredients for Spiced Apple Cake
Apples - 4-5 [I used different varieties]
Cinnamon Powder - 1 tsp
Sugar – 5 tbsp
Plain Flour/Maida – 2 Cups
Baking Powder - 2 tsp
All Spice Powder - 1/2 tsp
Nutmeg Powder - 1/2 tsp
Salt - 1/2 tsp
Eggs - 3
Sugar - 1 1/2 cups
Vanilla Extract – 1 tsp
Vegetable Oil – 3/4 Cup
Milk - 1/4 cup
Method:
1. Wash, core and dice apples, we don’t have to peel apples.
2. Toss with 5 tbsp sugar and cinnamon powder and set aside.
~ If you leave aside this for long time or a hour sugar will release water, which happened with me as I got busy with cooking lunch. But it’s not really a issue, we can use the water.
3. Sift together flour, baking powder, salt, all spice, nutmeg powder.
4. In a bowl beat eggs and sugar together until fluffy and sugar dissolves.
5. Add vanilla extract, milk and oil mix well. Now add flour mixture in batches, stir well to incorporated all ingredients.
6. Preheat oven to 350 degree or 180C. Prepare a 8 inch pan grease and dust with flour or line with parchment paper.
7. Pour half of cake batter into pan, spread half of apple over it.
8. Pour remaining batter over apples and again arrange remaining apples on top.
9. Bake for 1 hour 10 minutes hour or until a toothpick inserted in center comes out clean. Cool cake completely on a wire rack before slicing.
~ Check if the cake is baked after an hour.
Our cake is ready.
Have a nice day ~~
Homemade Ginger Powder Recipe
This ginger powder recipe post is pending from the time I posted garlic powder. Making ginger powder at home is so easy and economical, not to mention freshness we get can’t be compare. I used to buy ginger powder and never really like the smell and after a while it’s turns into bad smell and taste. This ginger powder recipe is again my SIL recipe, she makes this in huge batches and keep.
I had step vise picture, now it seems I lost those, but this recipe is so simple and straight forward that stepvise pictures are really not indeed. You can make this in small quantity for a start if you want and store. Try this once and you will not go back to store brought ginger powder anymore. If you like ginger tea then mix little amount of this ginger powder with tea dust/powder and store, you easy instant ginger tea ready.
Ingredients:
Fresh Ginger – 1/2 Kg or as you want
Method:
1. Wash ginger 5-6 times in fresh water each time or until ginger gets very clean. We don't have to peel ginger.
2. Chop ginger in to small pieces. Smaller you make better it is.
3. Sun dry ginger pieces in a clean cloth for 2 days or until ginger gets completely dried, it may take 1 day or 3-4 days too.
4. Once ginger is totally dried pulse in mixer or spice grinder into fine powder in batches if making in large quantity.
5. Sieve ginger powder, transfer back the remaining amount into mixer and grind again.
6. Sieve one more time and sun dry for 30 minutes ginger powder again.
7. Store in air tight container and use as required.
The powder you see in picture is more than a year old and it’s still fresh with strong fragrance.
Have a nice day ~~
Eggless Banana Chocolate Chips Muffin
I wanted to make banana and chocolate chips muffin for a long time now and every time I kept banana to ripen well but then in the end I have to throw it for some reason or other. This time I did the same kept the banana, it was well ripen but still I kept postponing to bake the muffins, in the end I just pulled the socks and did it.
Ingredients: [ Yields 6 Muffins]
Mashed Banana – 1 Long
Plain Flour - 1 Cup
Baking Powder - 1 tsp
Milk -1/2 Cup
Sugar - 1/2 Cup [ I used little less]
Oil - 1/4 Cup [ or butter 1/2 cup]
Vanilla Essence - 1 tsp
Chocolate Chips - 2 tbsp
Method:
1. Mash banana well, I used mixer to do the job.
2. Shift flour and baking powder.
3. Add mashed banana, milk, sugar, essence, oil and mix everything well to combine.
4. Add chocolate chips and fold.
5. Preheat oven to 180C and line muffin tray. Fill muffin liners with batter.
6. Sprinkle few chocolate chips on top and bake for 25-30 minutes or until a toothpick inserted in center comes out clean and cool muffins in wire rack.
Enjoy these yummy muffins.
Have a nice day ~~
Black Forest Cake
Remember my tricolor cupcakes with cream frosting, the same day I also made this black forest cake for DH birthday. Last year I baked chocolate cake with chocolate frosting which was so delicious I got wonderful review for it from DH and others but couldn’t post it as I didn’t took pictures.
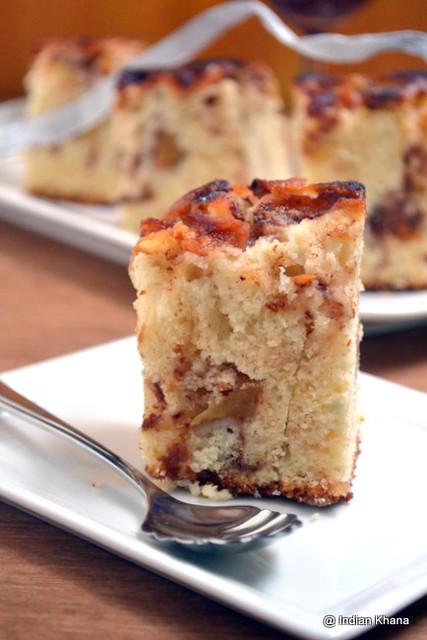
This year after a lot of thinking I decided to make black forest cake as it was in my wish list for long and took all my effect to take pictures too. The step vise pictures looks a bit messy, but having newspaper over the counter really helps a lot with aftermath of baking as the one part I hate about baking is cleaning after all the work done, always end up having so many things to wash, clean, wipe and store back all the spoons, cups, tins and what not! It’s just me or any of you have same feeling too? Anyways here the cake just before cutting :)
Coming back to our cake, yes I agree I didn’t pipe well and it doesn’t cook all pretty too as I am still learning and hope to do better in future. It was a humid day (as always) the icing was melting which you can see in the pictures and I was running out of my patience. If you are patience enough and practice you can decorate the cake nicely it comes with practice so don’t be dishearten if 1st time you don’t get it right, you will eventually get it it’s just matter of time.
Anyways the cake tasted deliciousssss, seriously it was too delicious everyone liked it and I shared this with my friend and she loved it too. I adapted the recipe from joyofbaking and from Prema’s black forest cake recipe and came up with my own recipe, and thanks to Prema for always motivating to try icing, no matter how I do she still praise it with kinds words (though I know the truth ;)). So not dragging any more let’s look at the recipe. Posting this cake today as it's dear friend Dharini birthday, so here you go gal Wish you Happy Birthday.
Ingredients:
[Adapted from Joyofbaking & Prema’s Culinary]
For Chocolate Sponge Cake
Plain Flour – 250gms ( 2 cups)
Baking Powder – 1 1/2 tsp
Baking Soda – 1 tsp
Salt – 1/4 tsp
Eggs – 4
Granulated White Sugar - 200gms
Vanilla Extract – 1 tsp
Vegetable Oil – 60 ml [4 tbsp]
Cocoa Powder – 30 gms [ 1/3 cup]
For Whipping Cream Frosting & Assembly
Whipping Cream – 400ml
Icing Sugar – 20gms
Pitted Cherries – 1 tin [halved, keep the syrup]
Corn Flour – 1 tbsp
Granulated White Sugar – 2 tbsp
Maraschino Cherries – 10-12
Chocolate Rise – 100gms
Colorful Sprinkles – 1 tbsp [optional]
Method
For Chocolate Sponge Cake
1. Shift plain four, baking powder, soda, salt and keep aside. Line and grease a 9" round baking tin. Preheat oven at 180C [ I used 8” round baking tin].
2. In a large bowl break eggs, add sugar and beat in high speed for 5-6 minutes or until egg mixture gets light & fluffy add oil, vanilla extract and beat for a minute to combine everything well.
- For eggless version, replace eggs and sugar with 1/2 cup of condense milk and rest of procedure is same
3. Add cocoa powder, Keep adding flour in small quantities and blend well.
4. Pour batter into prepared pan and bake 30-35 minutes or until a toothpick inserted into the center comes out clean. You will also notice cake will start to leave sides of pan. Cool on a metal rack for 5 minutes before removing cake from pan and then cool the cake completely before frosting.
- [You can bake this as a single cake like I did or divide the batter in two same size tin and bake twice, you need to check the cake after 25 minutes if it’s baked fully.
- You can make the sponge cake in advance and store in fridge (wrapped well in cling) up to to 2 days before doing frosting]
For Frosting
5. Remove wax paper from cake and slice the cake in 2 or 3 layers horizontally.
- [If you baked the cake in 2 pans then slice in 2 layers so in total there will be 4 layers of cake]
7. Heat drained juice along with 2 tbsp sugar until it starts to boil, slow flame, now add corn flour mixture and whisk briskly. In a minute juice will start to thicken off flame and keep aside to cool.
8. In a large bowl add whipping cream, icing sugar and beat till stiff peaks.
Now that we have all prep work done we can work on our assembly.
For Assembly
9. Place a cake layer on the cake board and brush with prepared syrup evenly over, idea here is to soak cake to make it soft but do not add too much of syrup it will make the cake soggy and it will break.
10. Add a dollop of cream on top and spread over, decorate with cherries.
11. Repeat for 2nd cake layer with syrup, cream and cherries. Keep the third layer on second,spread the cream on top evenly.
12. Frost sides of the cake. Fill cream in a piping bag and decorate top sides. In the center you have include chocolate shaves. I thicken up remaining syrup and spread it in center.
13. Coat sides of cake with chocolate rice and also on top of cake and pipe lower edges of cake.
- [I did a mistake of piping top and bottom of cake and then coat chocolate rice]
14. Place the Maraschino cherries at the top and add sprinkles in center.
Want a bite?
Have a nice day ~~
Eggless Strawberry & Banana Muffins
I was in happy mood over weekend as my work was appreciated and I achieved what I was targeting for 2 years, as they say hard work does pay offs, & to celebrate that I shopped, ate and baked! I tried this combo of strawberry and banana and it came out so good it was way better than I expected, banana & strawberry together works as charm and the flavour is just so delicious. I didn’t follow any recipe but did on my own and made this muffins as eggless butter-less, if you don't add strawberry emulco (and it’s fine) it will still have light pink color as strawberry and milk is grinded and added. Have along with any juice, tea/coffee as breakfast or snack. We had it with Pear and Orange Juice for breakfast and others disappeared in no time.
Ingredients: [Yields 12 regular size Muffins]
Granular Sugar – 1/2 Cup
Brown Sugar – 1/2 Cup
Oil – 3/4 Cup
Silken Tofu – 1/2 Cup [whipped] I used Oranigc
Ripe Banana – 2 Large
Vanilla Extract – 1 tsp
Plain Flour – 2 Cups + 1 tbsp
Baking Powder – 1 1/2 tsp
Salt – 1/4 tsp
Orange Zest – 1 tsp [optional]
Strawberry – 1 Cup [chopped]
Milk – 3/4 Cup
Strawberry Emulco – 1 tsp [optional]
Method:
1. Preheat oven to 180C. In a bowl mix white and brown sugar with oil until sugar almost dissolves.
2. Add orange zest, whipped tofu and mashed banana and mix well.
~ I didn’t whip tofu but add and mix well with other ingredients. It’s better if you whip it and then add.
3. In a another bowl or plate sieve flour, salt, baking powder and mix with wet ingredients in small batches and stir, do not over mix.
4. Beat 1/2 cup of strawberry pieces with milk until smooth and add to muffin batter and mix well. Now add vanilla essence and strawberry emulco (if using) and give a good stir.
5. Coat remaining 1/2 cup of strawberry with 1 tbsp of flour and mix with batter, this is to prevent fruit from sinking on bottom.
6. Line muffin tray with liners and scoop batter until 3/4, if you wish add few strawberry pieces on top. Bake for 20-25 minutes or until a toothpick inserted in centre comes out clean.
~ Keep eye after 20 minutes, I used baked muffin liners and cupcakes cups to bake, though in these cups the batter is more than double of normal size muffins.
Cool in wire rack for 5 minutes, remove muffins and allow to cool completely.
Relish these cute and delicious muffins.
Have a nice day ~~

